

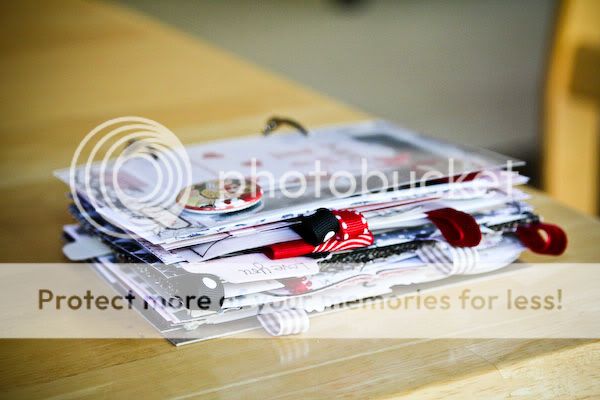
Today I'm going to share my process for making the book, and some pages from the book.
The idea for the gift book started in mid-April, when I discovered the mini art journals that Eve Johnson (Evalicious) put together in her shop. I loved them at first sight! At that time, she had a "Love You" mini art journal for sale. It's the base of a 4x6 mini book, along with some of her handmade embellishments and other pieces that she's lovingly curated together. She had released it in January for Valentine's Day, but re-released it later for any occasion to make a "Love You" mini album. I thought it would be the perfect anniversary gift for Todd, so I purchased it in secret and made sure I got the mail and he didn't know about it.
After I received the mini book from Eve, I started collecting additional embellishments that I thought coordinated with the theme and style of the book. I also started a project note in Evernote. My project plan had links to products that would go nicely in the book, techniques I'd like to incorporate, and I started a list of reason why I love my husband Todd. I also started to collect photographs that I wanted to use in the book. This was an ongoing list and I slowly worked on gathering the journaling and photos. I had to work on this project when Todd wasn't around, or when he was busy doing something else around the house.
Using Adobe Lightroom | I used Lightroom to organize the photos I wanted to use in the mini book project. I created a tag called "love you mini" and whenever I found a photo that I wanted to use in the book, I tagged it. That way, when I'm ready to print photos, I can just filter on the "love you mini" tag in Lightroom and see the complete collection of photos I had picked out and export them together to a project folder. I do the same thing with my ongoing Project Life album. I take too many photos every week to print them all out, so I tag the ones I plan to put into my Project Life album (my favorites of the week that tell the stories of the week). That way when I get ready to print, I have them all in one place again. I also use Lightroom to pick the photos that go onto my blog. I can't extol the virtues of Lightroom enough. I would have never been able to handle Project 365 in 2009 without it. It makes photo organization for projects SO much easier and the workflow is awesome. I process all my photos, tag them, and export them in both blog size and print size, ALL from within Lightroom. It is one powerful software that I cannot do without.
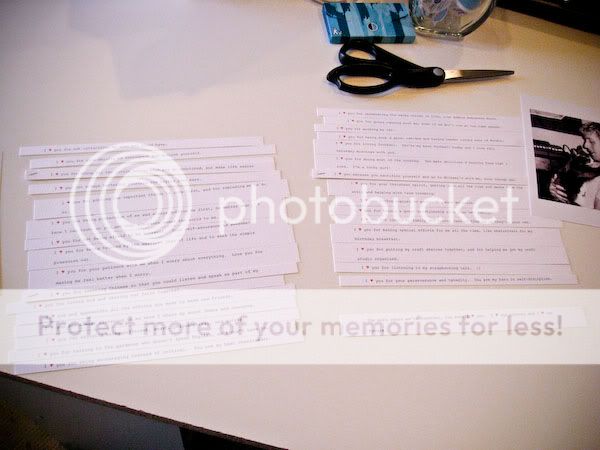
Journaling | I thought about how I wanted to add journaling to this book. Should it be handwritten all the way? Or a mix of handwritten and typed? Since I had so much journaling to fit into the book, I went for consistency. I took my list of why I love Todd from Evernote and copied it into Microsoft Word. Then I replaced the word "love" in each sentence with a ♥ (which is ALT + 3 on a PC, by the way!). Then I played with the spacing in Microsoft Word so that when printed out, I could cut the sentences into strips that are just the right size for my mini book.
I printed the journaling out onto Bazzill white cardstock in orange peel texture. I used Courier New font to make it look like I typed it out on a typewriter.


Then I cut the journaling into strips.
I had two large ziplock bags for organizing all my journaling strips and photos. One for general photos and sentiments and one for specific photos and sentiments. General means they're sentiments that I don't have specific photos to convey, so I just use cutesy/artsy photos of us together. Specific means I do have very specific photos in mind to tell a specific story of why I love him. An example is that I love him for loving my family and treating them as if they're his own. So I found a photo of him with my mom and dad from back in 2006, when my mom was ill with cancer and the four of us took a trip to Hawaii.


Next I trimmed all the photos I wanted to use. I had made them specific sizes in Photoshop, because I wanted them to be smaller than the size of the book (4x6). Some I made specifically to around 2 inches square so that I could use my 2.5" Marvy square punch to punch them out with a white border.

I should point out that I worked on this in small chunks of time, over 2 months. I had a secret place where I kept it all together, so if Todd came home I could just shove all the supplies in there, ha ha!
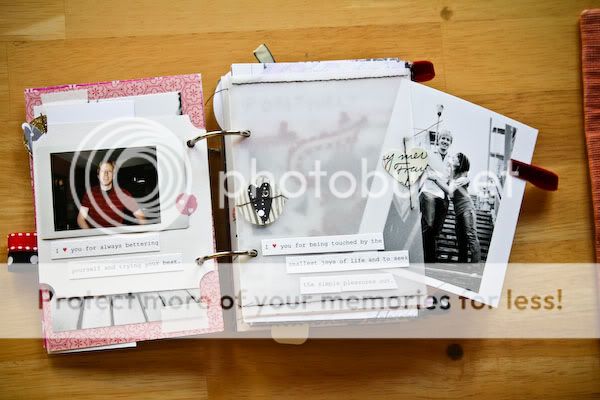
One Task At A Time | I made the project easier for myself by concentrating on one task at a time. I find that's how my mind works and it makes everything go faster. So I adhered all the photos into each page of the book first. Then I cut the journaling into the right size for the page and glued those on for all the pages. My last step was embellishment. I planned it that way so that the embellishments went into the spaces last so that they didn't cover up important parts of photos/journaling. And it was much easier to have all the embellishments I wanted to use in one place and just look at each page and decide what needed to be done, after the photos + journaling were there already.
I would have to say, the planning part of this project probably took more time than the execution. Collecting my journaling thoughts and picking out photos took a long time. Printing out photos took a long time (There's about 40!) Collecting embellishments took a long time. The actual adhering of photos and journaling didn't take as long, as well as the actual embellishing.
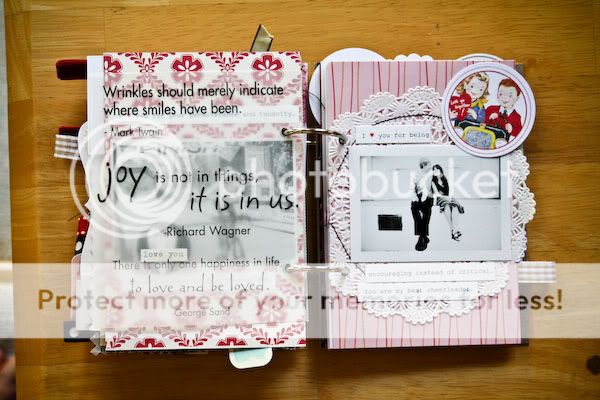
I love how the book turned out! But even more so, I love that Todd loves it because he knows I put a lot of thought and work into it. Some of the sentiments that I expressed are things that I'm so thankful to him for, but I don't say them every single day.
Here are some pages of the book.


Let me know in the comments if you have any questions about the process or products, or anything else you would like to know. :)
That's soooooo gorgeous Christine ... a real labour of love. Such a beautiful way to express your love & celebrate 17 years of marriage at the same time!
ReplyDeleteIt's really beautiful, Christine!!!!!
ReplyDeleteSooo sweet! The book is really cool, too!
ReplyDeleteChristine, this is so cool, love how you put it together. Maybe one day I can do the same for my husband.
ReplyDeleteChristine, this is beyond AWESOME. I think you've just made my dream project!!! :D
ReplyDeleteA MAZ ING! Love this with my whole heart!
ReplyDeleteThis is so gorgeous! I love how much work and time you put into it--it really shows!
ReplyDeleteThanks for explaining the computer tools (lightroom, evernote) that you used to make this project go together. I loved reading about the flow of the project. It makes it feel attainable. One question...how do you get your hubs to smile so nicely for all the photos!!! When I get my camera out, my hubby hides or gives me super cheeze!!!
ReplyDeleteWow Christine! I absolutely love it. So amazing! Every little detail is perfect. You are so talented!
ReplyDeleteThis is beautiful! Thank you for sharing.
ReplyDeleteI've been a fan of you for a long time - seeing your cute album is awesome!! Thanks for sharing! I also LOVE that you are using Lightroom!! :)
ReplyDeleteYour album is AMAZING!
ReplyDeleteWhat a lovely mini album. I'm happy your husband appreciates it!
ReplyDeletelove your take on this album:) Your photos are gorgeous, Christine!!
ReplyDelete