Showing posts with label Tutorial. Show all posts

Thursday, June 18, 2015

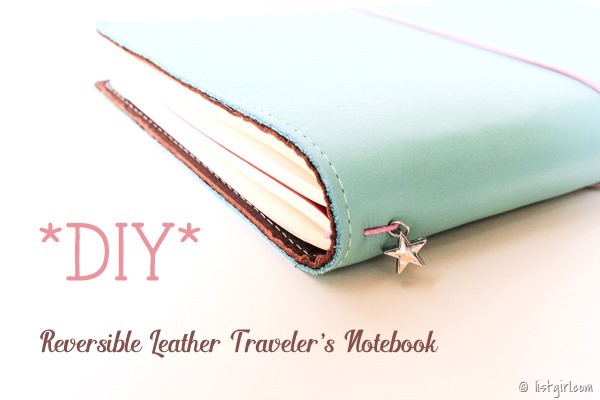
Tutorial | DIY Reversible Leather Traveler’s Notebook

20150613-IMG_5659_CLN_600

The Midori-style traveler’s notebook is all the rage currently in the crafting/planning/scrapbooking world.  I have jumped in head-first, because I’ve always loved notebooks and list-making.  Um, my blog is called listgirl.com, right? :-)  The original Midori Traveler’s Notebook is from Japan.  It was intended to be used to document life’s adventures.  Nowadays crafters, planners, and scrapbookers are using it to doodle, plan, make lists, and document their lives like a scrapbook.  This style of notebook consists of a cover, along with a series of elastic cords to keep notebooks, folders, pouches, etc. in place inside the notebook.  If you google “fauxdori”, you will see a ton of people making DIY traveler’s notebooks either for themselves or for sale.

I decided to try to make my own traveler’s notebook, just for fun and experience.  I wanted it to be leather on both sides and reversible. 
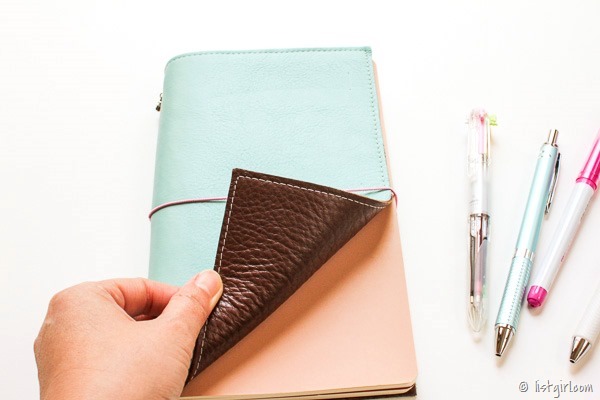
20150613-IMG_5662_blog

And I wanted to make it as cheap as possible.  After all, this is DIY.  I did purchase a genuine Midori regular size in brown, and it cost about $45 on Amazon.  I wanted to make one a lot cheaper on my own, just to see how economical it could be to make your own.  I got my materials from Michaels and Joanns.  I had all the tools already in my craft studio.  If you needed to purchase more tools to make them, then you would need to spend more money investing in the tools.

MATERIALS:

  • Light blue leather 8.5x11 ($4.99 after 50% off coupon at Michaels)
  • Chocolate brown leather 8.5x11 ($4.99 after 30% off coupon at Michaels)
  • Metal star charm ($0.46 after 30% off coupon. It was part of a three-set charm for $1.39)
  • Therm O Web Heat N Bond Ultrabond 17”x 1 yard ($0.29.  The entire sheet was $1.75 after 50% off coupon at Joann, and I used about 1/6 of it.)
  • Elastic cords ($0.22.  It was $3.99 for six colors for a total of 18 yards.  I used not even one yard.)
  • Sewing thread (negligible cost)

So my total cost was about $10.95, under $11!

Here’s the two pieces of leather laid  out side by side before I got started.  The underside of the leather is more uneven and fibrous. 

20150612-2015-06-12 16.12.49_blog

I used Heat N Bond Ultrabond with an iron to fuse the two undersides of the leather together.  I didn’t take photos of that because I was using an iron.
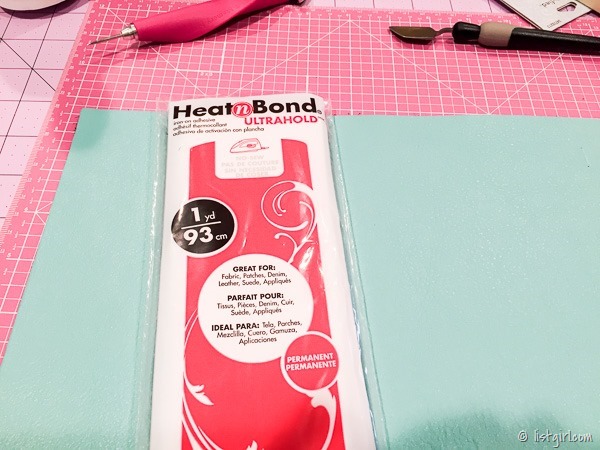
20150612-2015-06-12 16.23.05_blog

After fusing the two pieces of leather together, I measured the middle of the leather piece and punched two holes toward the top and two holes toward the bottom.  These will be for stringing the elastic cords through to hold the notebooks.  I used my WRMK piercing tool.
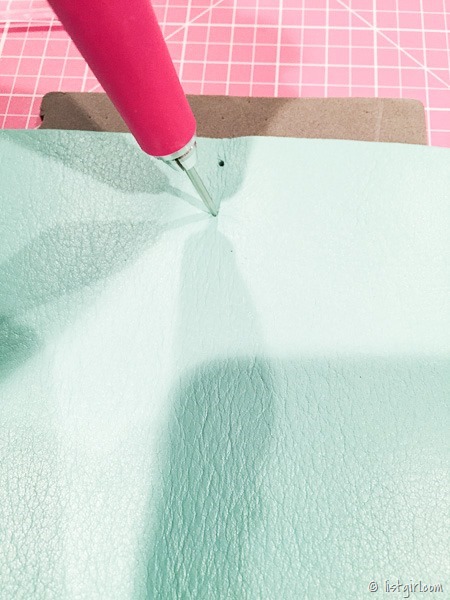
20150612-2015-06-12 17.24.36_blog

I also pierced a hole in the middle of the notebook.  That’s for stringing the elastic loop for holding the whole thing together.

20150612-2015-06-12 17.29.20_blog

Then I used a big needle to string the elastics through the leather cover. 
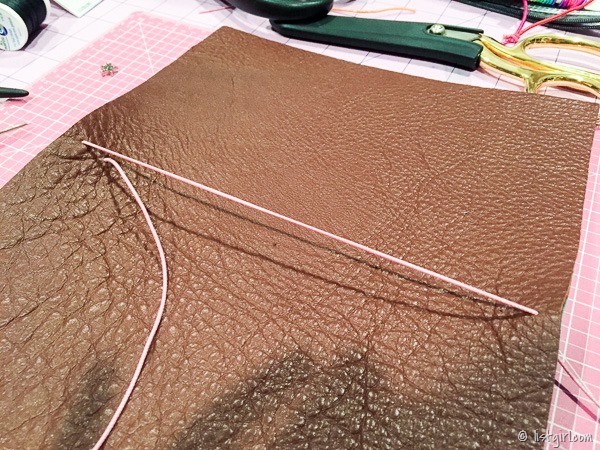
20150612-2015-06-12 17.43.21_blog

I was basically done with the construction at that point.  However, after handling the notebook for a while, I decided that the Heat N Bond didn’t hold the two pieces of leather glued together well enough, especially on the edges.  So I decided to use my sewing machine and and add a stitched edging to hold the two pieces together.
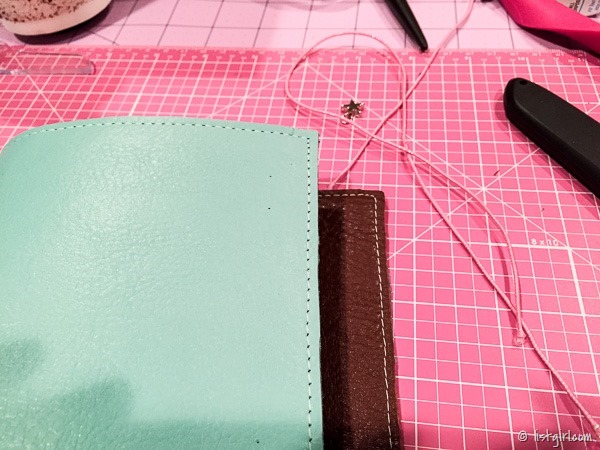
20150612-2015-06-12 19.21.43_blog

The stitched edge really gives it a finished look!  I really love how my reversible leather traveler’s notebook turned out!
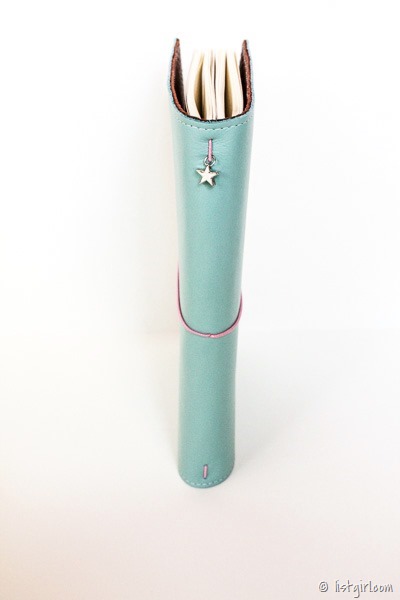
20150613-IMG_5656_blog

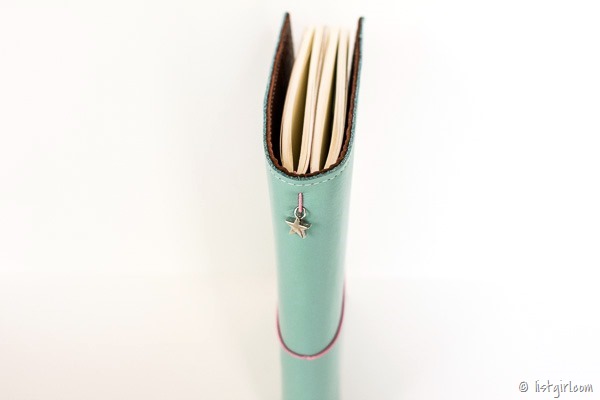
The star charm in the top loop.

20150613-IMG_5652_blog

Since the chocolate brown leather is just as good quality and the light blue one, I can use that side as the outside when I feel like it.  I would just need to re-string the elastics.
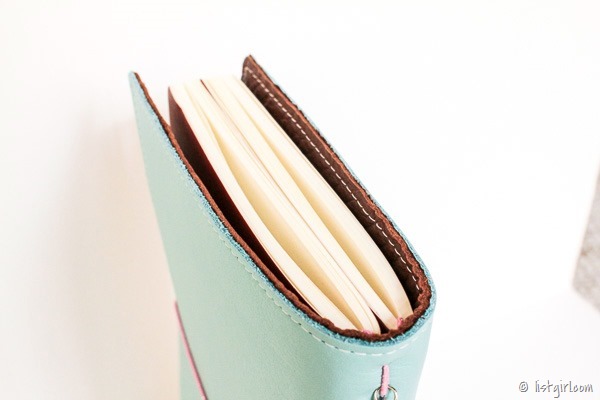
 

20150613-IMG_5657_blog

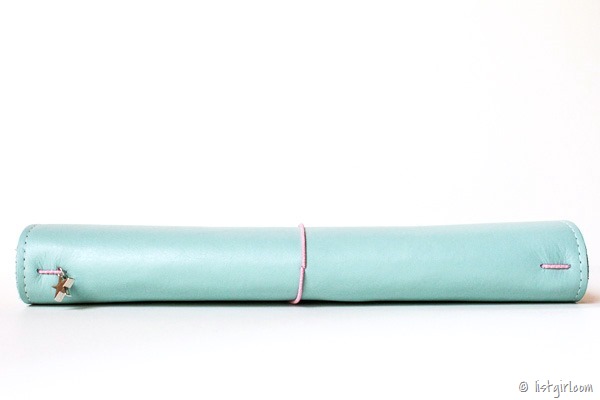
Sideways view.

20150613-IMG_5658_blog

20150613-IMG_5661_blog


20150613-IMG_5663_blog

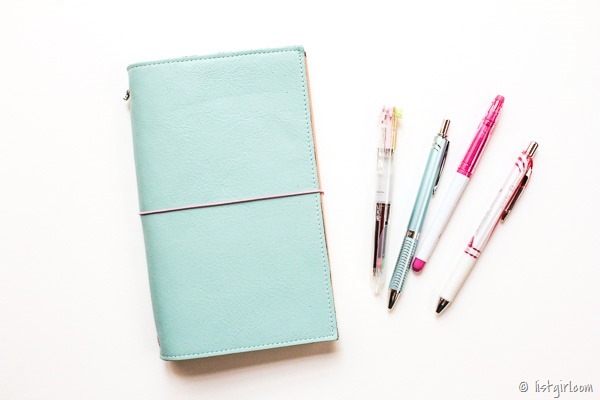
The finished notebook cover is 8.5x11 (I didn’t cut the leather, except to trim the edges so that both pieces are straight). 
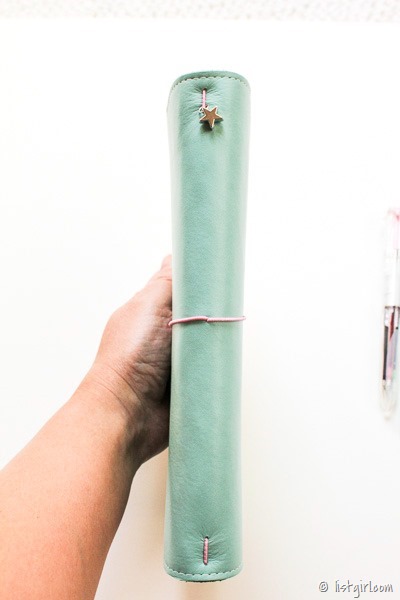
20150613-IMG_5664_blog

I strung the elastics so that there are two vertical ones.  It holds two or more notebooks.  You can add elastic bands (or long rubber bands) to hold even more notebooks together. 

20150613-IMG_5672_blog

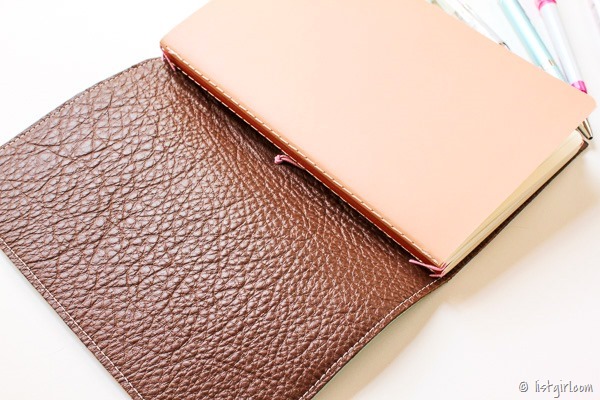
The width of the cover is exactly perfect to hold two 5x8.25 large Moleskine Cahier notebooks.  I happened to have the same sized Piccadilly Memo Medium notebooks, so I used those. 

20150613-IMG_5666_blog

The 5x8 May Books would fit in here too. 
20150613-IMG_5665_blog

I really love how my DIY reversible leather traveler’s notebook turned out!  The leather is soft and I love that it’s reversible.  I also love how economical it was to make something like this, with coupons for Michaels & Joann.  I just wish that the leather came in more colors, because I would make many more, ha ha!  This is my biggest sized traveler’s notebook.  It will most likely stay home.  I will use it for crafty planning & ideas.

Hope you enjoyed this tutorial on how I made my DIY traveler’s notebook, and are inspired to make one of your own!  ♥

Read More »

Friday, June 12, 2015

Evalicious | Tutorial | DIY Midori-Style Notebook

20150605-IMG_7901_blog

Hi everyone!  I am on the Evalicious blog today with a tutorial on how I made my own Midori-style notebook for my Midori Traveler’s Notebook!  If you’re not sure what a traveler’s notebook is, I googled some images for you.  The original traveler’s notebook was created by Midori in Japan.  It is a leather cover with a series of elastic bands.  You can include from 1-5 or so notebooks inside it, and use it for scrapbooking, journaling, list-making, sketching/drawing, or anything else you want!  You can even use it as a planner.  The Midori-branded notebook refills are slightly pricey and also very plain, so I thought I would make my own notebook refill with Evalicious goodies!

These are the main supplies I used to make my notebook.  Some 8.5x11 cardstock for the cover, and filler paper for the insides.  A ruler, paper trimmer, rotary trimmer, long-reach stapler, and ink and stamps.

20150605-IMG_7888_blog

I measured my authentic Midori notebook that came with my Midori leather notebook cover.  The cover is about 8.75” x 8.25”, or 22cm x 21cm.

20150605-IMG_7889_blog

I trimmed my cover cardstock to the size above.

20150605-IMG_7890_blog

Then I trimmed the filler paper down to the same size.  I used Hammermill 32 lb. color copy paper, because that’s what I have on hand and it’s nice and thick so pens won’t bleed through to the other side.  Yes, I’m very picky about writing paper and I love this paper.  It’s very smooth.

20150605-IMG_7891_blog

And yes, I am crazy about good writing paper.  Here I tested this paper out with different pens and ink pads that I have, to ensure that this notebook will be perfect for my needs!

20150530-2015-05-30 11.12.33_blog

I stamped the cover cardstock with various Evalicious stamps.  I used Field Notes clear stamp set and Happy Note stamp set.

20150605-IMG_7892_blog

I spaced the stamps out for the front and back cover of the notebook.

20150605-IMG_7893_blog

Then I folded the filler paper pages in half, using a bone folder to get a good fold.

20150605-IMG_7894_blog

I unfolded both the cover and the filler papers and lined them up and secured them with binder clips.  Then I used my long-reach stapler to staple the middle seam of the notebook all the way through.  If you don’t have a long-reach stapler, you can unfold a regular stapler, put a mouse-pad or eraser underneath the papers, and staple it through and bend the wires shut on the other side.

20150605-IMG_7896_blog

Now you have a notebook!  But wait, the inside papers are showing past the cover, due to the thickness and the folding.

20150605-IMG_7897_blog

I trimmed off the paper overhang with a steel ruler and a rotary trimmer.

20150605-IMG_7898_blog

Then I added a label from This Way Snipsnip Labels to the cover.  Once I start using the notebook I’ll stamp or fill in the title and dates onto the label.

20150605-IMG_7901_blog

I slipped my new notebook into one of the elastic cords inside my Midori traveler’s notebook.  Now I have two notebooks in there.

20150605-IMG_7902_blog

I love how the stamped images look on the front cover of my notebook, all lined up down the middle!

20150605-IMG_7903_blog

I can’t wait to start using my new DIY notebook for my Midori!  I hope you enjoyed this tutorial on how to make your own refill notebooks.  Now go forth and make notebooks, it’s addicting!

Thanks for stopping by!

Evalicious Products Used:


Field Notes Stamps

happy note stamps

this way snipsnip labels
Read More »

Monday, February 2, 2015

Tip: Removing Color Cast on Project Photos

20150118_comparison

It’s been very difficult to photograph white layouts during the winter.  I have to do it in the morning before I go to work, or wait until the weekend.  White cardstock backgrounds is especially hard to photograph, regardless of the season and lighting.  However, it is my most FAVORITE background color for a scrapbook page, so I figured out how to make it look much better.  Today I thought I would show you how I remove the color cast and adjust the white balance of the photo of my layout using Photoshop.

Here’s the before photo. It just looked dark and has a color cast on it. 

20150118-IMG_5208_CLN_1000

Here’s the after.  Much better, right?

20150118-IMG_5208_CLN_blog_PS

In Photoshop, go to the “Image” menu on top and you click on “Adjustments”. Then click “Curves”. When the Curves box pops up, click on the white eyedropper, which is the eyedropper furthest to the right in the group of three of them.

Curves

Then click on the white cardstock background of your layout (somewhere where it should be white). Watch the magic!

You can use the PC keyboard shortcut CTRL + M to bring up the Curves box.  Now it takes me literally 5 seconds to make my layout much whiter and brighter!  :)

Read More »

Wednesday, January 21, 2015

Tutorial: Creating Photo Collages Using Lightroom

20140817-2014-08-17 18.06.37-1_LR

One of the questions I get asked most often when people see my printed photos or my Project Life pages is:  How do you make your collages?  The answer is I use Adobe Lightroom’s Print Module to create and print collages.  It is super-easy and magical after you’ve set up your templates!  And setting up the templates doesn’t take too long either.  It’s so easy and time-saving that I think it may be the best kept secret in scrapbooking!

20140805-IMG_4042_LR

I’ve created several videos below, showing you how to create different types of collages within Lightroom.  Please watch them in sequence because they build upon the previous ones.  Keep in mind that I’m just trying to give the information in a succinct way.  I didn’t do any voiceovers after the fact.  All the audio of me talking is recorded through the microphone as I was doing the video screencast tutorials.  So just be prepared for a few “ums” and “ahs”.  ;-)

The first video shows you how to set up your printer to print the right size and the right settings from Lightroom.  Please keep in mind that this set up is specific to my printer. (I have the Canon Pixma MG5320.  It is discontinued, but a very similar one is the MG6620.)  Your printer may be different, but the dialog boxes and choices hopefully will be very similar to mine.

Video:  Setting Up Your Printer To Print From Lightroom

You can see it in higher resolution at Youtube.


The second video shows you how to create a 4x6 collage with two photos.  It also shows you how to save your collage as a template so that you can use it over and over again with different photos!

Without an outside border.

1_4x6_2up_noborder

With an outside border.

1_4x6_2up_border

And in a square format.

1_4x6_2up_square

Video:  Creating Photo Collages in Lightroom Part 1: 4x6 with 2 Photos

See it in higher resolution at YouTube.


The 3rd video shows you how to create 4x6 sheet of 4-photo and 6-photo collages. 

2_4x6_4up_border

2_4x6_6up_border

Video:  Creating Photo Collages in Lightroom Part 2: 4x6 with 4 Photos & 6 Photos

Watch it in high resolution at YouTube.


The 4th video shows you how to create a 8.5x11 collage with 12 square photos.  You can adapt it to create other collages for printing on the 8.5x11 sheet.

3_85x11_12up

Video:  Creating Photo Collages in Lightroom Part 3:  8.5x11 with 12 Square Photos

Watch it in high resolution on YouTube.

If you’ve made it through all of the above, then I’ve got a free template for you to download!  This Lightroom template is for a sheet of 8.5x11 collage with 12 square photos, like above.

Download the Lightroom template here.

Save it to a folder of your choosing on your computer.  Not sure how to import the template and use it in Lightroom?  I’ve got a video tutorial for THAT!

Video:  How To Import and Use a Collage Print Template in Lightroom

Watch it in high resolution on YouTube.

And those are my tutorials on making collages in Lightroom!  Hope you learned something that makes scrapbooking and Project Life’ing faster and easier.  Let me know in the comments if you have questions.

Thanks for stopping by!  ♥

Read More »

Tuesday, October 14, 2014

Citrus Twist Kits | Rori’s Creamery

20141004-IMG_4243_CLN

My last layout and tutorial for Citrus Twist Kits as their October guest designer is up on their blog today. 

I love the simplicity of a grid layout, but I wanted to include more photos and embellishments.  I decided to make a layout with two folders on it so I could include more photos and embellishments.  I'll take you through the steps to create the folders.

1.  Cut your paper to 4" tall and 7" across.  Score or fold the paper in half, or at the 3.5" line.

ChristineNewman_Tutorial (1)

2.  I'm using a We R Memory Keepers envelope punch board to create my folders.  You could definitely just cut it by hand.  Line up the short edge of the paper so that the left corner is in the middle of the opening "hole" of the punch board.  Press down on the punch.

ChristineNewman_Tutorial (2)

3.  Flip the paper over and align the left side of the paper with the 2" ruler on the punch board.  Punch again.

ChristineNewman_Tutorial (3)

4.  Repeat the process on the other short side of the paper.  You'll end up with tabs on each side of the paper, one on top and one on bottom.

ChristineNewman_Tutorial (4)

5. Trim off the non-tabbed part of both sides of the paper.  You end up with a folder with a top tab and a bottom tab.

ChristineNewman_Tutorial (5) 

Here's my grid-style layout with the two folders in the upper left and lower right side of the layout.  I used a couple of little clothespins from my stash to keep the folders closed.  In the other spaces I added 3x4 photos and 3x4 patterned papers.

ChristineNewman_Roris (1)

I embellished the outside of the upper left folder with stamps and diecuts from the Shimelle line in the October kit.

ChristineNewman_Roris (2)

When you open that folder, you see an extra photo of Todd enjoying his ice cream.  On the right side I added some more diecuts to embellish the inside of the folder.  On the tab of the folder I stamped "good day" from the CTK "Hello Sunshine" stamp set designed by calligrapher April Joy Hill.

ChristineNewman_Roris (3)

I also embellished the outside of the lower right folder with diecuts, stamps, and sequins from my stash.

ChristineNewman_Roris (4)

When you open that folder, you can see the photo of my fresh mint patty ice cream on the right and more diecut embellishments on the left side.

ChristineNewman_Roris (5)

I love including interactive elements on scrapbook pages, especially if it means I can add more photos or journaling on the page!

Hope you enjoyed the tutorial for creating this interactive folder on a scrapbook page.  Thanks for stopping by!

Read More »
[feedly mini]