Showing posts with label Crafts. Show all posts

Thursday, February 28, 2019

On Being An Obsessive Enthusiast

20190211-2019-02-11 08.37.06_blog

Todd and I recently had a great discussion about something that we have in common with each other:  being obsessive enthusiasts of things / ideas / topics / subjects that we’re interested to learn more about.  And when I say learn more about… I mean spending a lot of time researching into the minute details of said subject.  His main interests involve science, technology, math, and music.  Mine are more varied and often involves DIY-ing something. 

I’ve always loved crafting and DIY since I was a little kid.  In fact you probably started following my blog for my scrapbooking, cardmaking, and papercrafting posts.  That has always been a big love for me, and while it is currently on the back burner, it doesn’t mean it can’t make a comeback someday.  But I have many many interests and actually researching into those interests is a big hobby of mine, LOL.  I absolutely LOVE being obsessive about something new-to-me and learning all I can about it!  My brain thrives on it and I love the stimulation it provides me.  I am definitely not someone that likes to have information fed or given to me.  I like to think through things myself, and my intensely curious mind will come up with lots of new questions that need to be answered.  I enjoy the PROCESS of learning and thinking, just as much as the end result of whatever it is that I make as a result of my research.

That’s why I get so annoyed at the comments section of DIY blogs.  Apparently my love of learning and thinking doesn’t apply to everyone.  I see so many intellectually lazy people who don’t want to think or experiment for themselves.  They will ask questions such as “what would the recipe for this be if I want to make 8 oz?”  I see this on DIY skincare and cosmetics blogs and YouTube a LOT.  And I applaud the blogger for anwering it as such:  “the formula is for 2 oz of face cream, so doing simple math can scale the recipe to 8 oz.”  :: slow clap ::  Do these people not scale recipes for food too??  When I read a recipe for making a meal, I make sure to see how many servings it is for.  And if it’s not the amount of servings I want to make, then I scale it to the amount I want to make.  For DIY things, I’ve created spreadsheets such that I can put the original formulation in, calculate the percentages used for each ingredient, then put in the total amount I want to make, and my spreadsheet will calculate the new amounts for each ingredient.  It’s a simple concept!  To me, the joy is in the process, not just in the end product.  I don’t want someone else to tell me EXACTLY how to do it.

Sorry about the soapbox.  I guess what I’m trying to convey is that I really get a lot of enjoyment out of learning, processing, and thinking.  I’ve told Todd before that if I hadn’t become an accountant & financial analyst, I probably would have been in science.  I actually have a bachelor of science degree in Psychology and did research for a professor in college.  I love to be methodical in research and in examining what would happen in different scenarios. 

20190117-2019-01-17 12.03.27_blog

An example of this is making lip balm with the perfect (to me) consistency.  I knew I wanted to use coconut oil, avocado oil, almond oil, and beeswax.  But what percentages of each would yeild the best consistency?  What would make the lip balm not too hard, not too soft, emollient yet stays on your lips and doesn’t slip off?  After doing research, I knew that beeswax provides the structure of the lip balm, and what the min and max percent usage should be to make an extremely soft or extremely hard lip balm.  So I methodically created several formulations of different beeswax to oil formulations and tried them out to come up with my ideal lip balm consistency.  I did the same thing with the lavender coconut lime body butter bar.  My first try the consistency was too soft, I adjusted the percentage of oil vs wax, and came up with a much better consistency.  I don’t want to take someone’s word for a formulation… I want to test everything myself!

So what happens when you take different percentages of these main ingredients

20190210-2019-02-10 15.57.56_blog

and mix them together with scent and micas, and then put them into water?  How does the skin feel?  How strong or weak is the scent?  How well does it bubble/foam?  How does the color mix look together in water?

20190211-2019-02-11 08.37.06_blog

And after some experimentation and I was satisfied, then this formulation became the Unicorns & Rainbows Fizzy Bath Parfait.

20190213-2019-02-13 13.31.16_blog

Honestly, the reading, thinking, formulating, and testing part of this is the BEST part.  And the making.  I really do enjoy the process of coming up with something beautiful, useful, and fun.  I guess I’m a proud obessive enthusiast! 

Read More »

Sunday, June 28, 2015

May Crafty Things and Obsessions

I know it’s almost June, but I did a lot of crafty things in May, and obtained new things and became obsessed with other things.  So I thought I would share them here.  I was writing posts for my personal private blog today and discovered a bunch of these fun photos from May, so I thought I’d post them over here on my public blog as well.

I Copic colored a bunch of things, because my Copic collection is finally at a place that I have enough colors to use!

20150501-2015-05-01 07.31.52-2_blog

I got a laminator and started foiling things.

20150516-2015-05-16 09.46.56-1_blog

20150519-2015-05-19 20.27.51-1_blog

I cleaned up and messed up my craft room many times over.

20150516-2015-05-16 08.50.49-1_blog

I got obsessed with traveler’s notebooks (Midori + fauxdoris) and ordered this Sojourner (Field Notes sized) from Rowena Curtis (@retrowtures on Instagram).  It arrived on 5/20.  I love it and have used it a lot!  I have four notebooks in there currently:  a calendar, a brain dump one, a sketch/draw one, and then one for lists (such as movies I’ve watched this year, crafty ideas to try, etc.)

20150520-2015-05-20 19.56.38-1_blog

I got obsessed with making DIY folders to go into my traveler’s notebook. 

20150523-2015-05-23 16.06.46_blog

I also got obsessed with Hobonichi planners and did a lot of research.  I finally ordered a Hobonichi Techno Avec from Japan at the end of May.

I got some more new pens from Jetpens.  That combined with my new traveler’s notebook obsession, I tested pen and ink pads on papers and notebooks quite a bit.  This was on the 32 lb Hammermill copy paper that I had a ream of already.  None of my pens bled through this, even the fountain pens.  Some of my inks bled through, especially the dye inks.  I think pigment and chalk inks work best in notebooks/planners, if you plan to use the other side of the paper.

20150530-2015-05-30 11.12.33_blog

20150530-2015-05-30 10.56.14_blog

I got two $9 containers from Amazon to hold my Copic markers and my pen collection!  Best thing is they stack, so it’s an expandable system.
20150531-2015-05-31 15.28.13-1_blog

I also re-discovered my Pilot Hi-Tec-C 05 pens and used them a lot.

I made Monika’s baby a softie kitty.

20150524-IMG_5603_blog

I made Peppermint a nerdy cat pen pouch for her birthday.

20150529-2015-05-29 15.55.38_blog

I made a bunch of cards in May.

For Todd’s mom Sylvia for Mother’s Day.

20150503-2015-05-03 15.47.29_blog

For Jen Carlson’s birthday.

20150503-2015-05-03 21.43.33_blog

Foiled cards.  This one for Sally’s birthday.

20150516-IMG_5573_blog

The next two for Paper Issues sponsored by Therm O Web.

20150516-IMG_5576_blog

20150516-IMG_5583_blog

This one for Monika’s baby shower.

20150524-2015-05-24 16.33.04_blog

This one for Peppermint’s birthday.

20150530-2015-05-30 08.42.20_blog

This one for Todd’s dad Tim’s birthday.

20150531-2015-05-31 14.37.46_blog

I got this set of stamps from Kelly Purkey and I love the pile of crap emoticon stamp!  I want to stamp that on my work notebook every day!

20150527-2015-05-27 09.25.33_blog

I actually do a lot of crafty things that aren’t for creative teams.  Those hardly ever make it onto my blog anymore.  If there’s anything you want to see more of, or that you want me to discuss in more detail. please leave a comment.

Read More »

Thursday, June 18, 2015

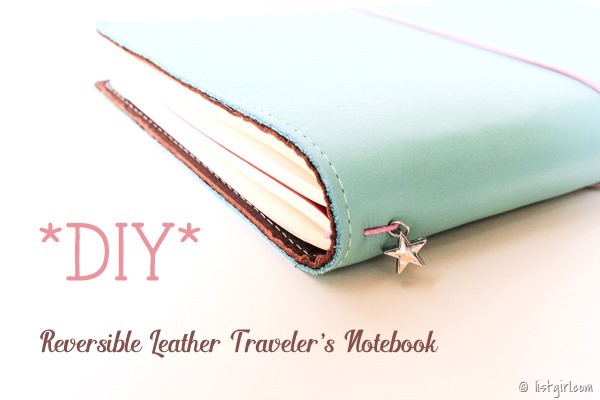
Tutorial | DIY Reversible Leather Traveler’s Notebook

20150613-IMG_5659_CLN_600

The Midori-style traveler’s notebook is all the rage currently in the crafting/planning/scrapbooking world.  I have jumped in head-first, because I’ve always loved notebooks and list-making.  Um, my blog is called listgirl.com, right? :-)  The original Midori Traveler’s Notebook is from Japan.  It was intended to be used to document life’s adventures.  Nowadays crafters, planners, and scrapbookers are using it to doodle, plan, make lists, and document their lives like a scrapbook.  This style of notebook consists of a cover, along with a series of elastic cords to keep notebooks, folders, pouches, etc. in place inside the notebook.  If you google “fauxdori”, you will see a ton of people making DIY traveler’s notebooks either for themselves or for sale.

I decided to try to make my own traveler’s notebook, just for fun and experience.  I wanted it to be leather on both sides and reversible. 

20150613-IMG_5662_blog

And I wanted to make it as cheap as possible.  After all, this is DIY.  I did purchase a genuine Midori regular size in brown, and it cost about $45 on Amazon.  I wanted to make one a lot cheaper on my own, just to see how economical it could be to make your own.  I got my materials from Michaels and Joanns.  I had all the tools already in my craft studio.  If you needed to purchase more tools to make them, then you would need to spend more money investing in the tools.

MATERIALS:

  • Light blue leather 8.5x11 ($4.99 after 50% off coupon at Michaels)
  • Chocolate brown leather 8.5x11 ($4.99 after 30% off coupon at Michaels)
  • Metal star charm ($0.46 after 30% off coupon. It was part of a three-set charm for $1.39)
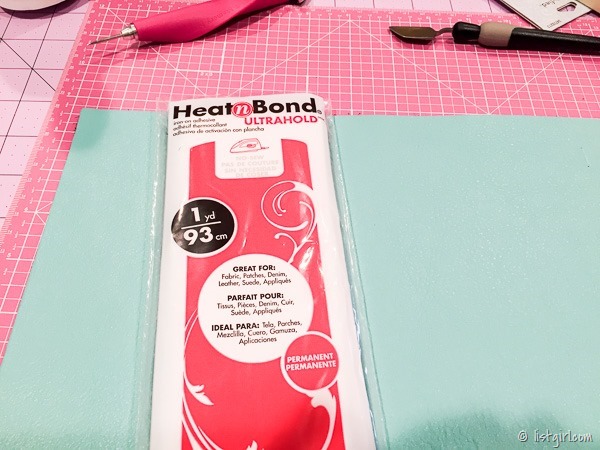
  • Therm O Web Heat N Bond Ultrabond 17”x 1 yard ($0.29.  The entire sheet was $1.75 after 50% off coupon at Joann, and I used about 1/6 of it.)
  • Elastic cords ($0.22.  It was $3.99 for six colors for a total of 18 yards.  I used not even one yard.)
  • Sewing thread (negligible cost)

So my total cost was about $10.95, under $11!

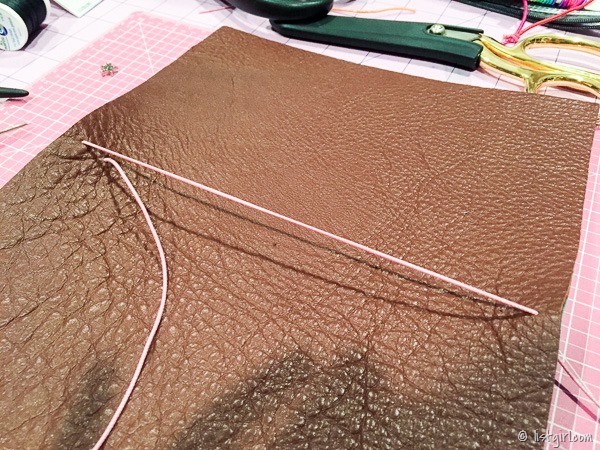
Here’s the two pieces of leather laid  out side by side before I got started.  The underside of the leather is more uneven and fibrous. 

20150612-2015-06-12 16.12.49_blog

I used Heat N Bond Ultrabond with an iron to fuse the two undersides of the leather together.  I didn’t take photos of that because I was using an iron.

20150612-2015-06-12 16.23.05_blog

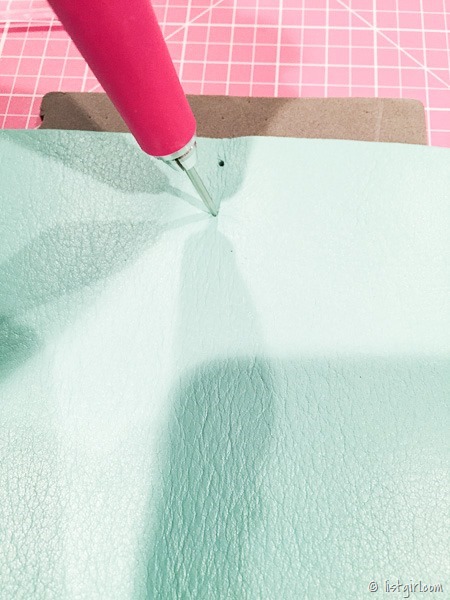
After fusing the two pieces of leather together, I measured the middle of the leather piece and punched two holes toward the top and two holes toward the bottom.  These will be for stringing the elastic cords through to hold the notebooks.  I used my WRMK piercing tool.

20150612-2015-06-12 17.24.36_blog

I also pierced a hole in the middle of the notebook.  That’s for stringing the elastic loop for holding the whole thing together.

20150612-2015-06-12 17.29.20_blog

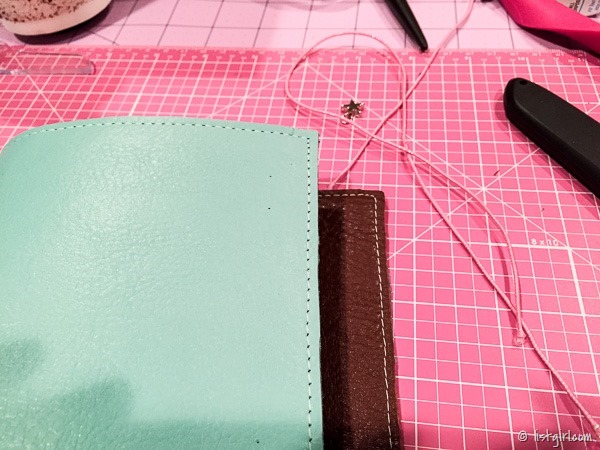
Then I used a big needle to string the elastics through the leather cover. 

20150612-2015-06-12 17.43.21_blog

I was basically done with the construction at that point.  However, after handling the notebook for a while, I decided that the Heat N Bond didn’t hold the two pieces of leather glued together well enough, especially on the edges.  So I decided to use my sewing machine and and add a stitched edging to hold the two pieces together.

20150612-2015-06-12 19.21.43_blog

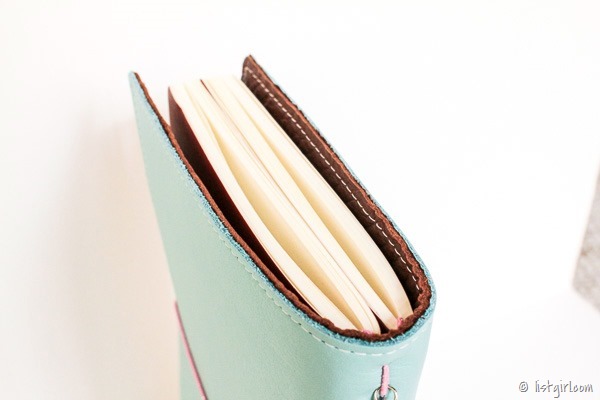
The stitched edge really gives it a finished look!  I really love how my reversible leather traveler’s notebook turned out!

20150613-IMG_5656_blog

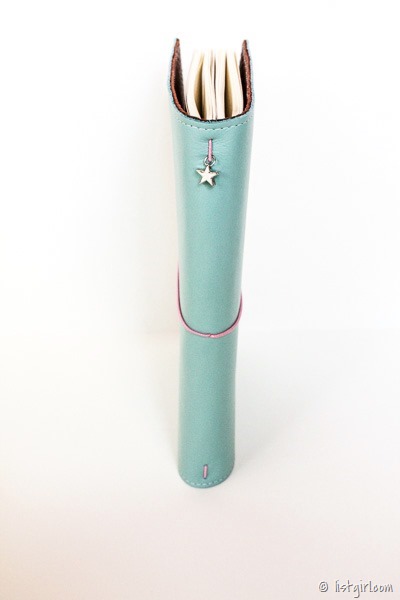
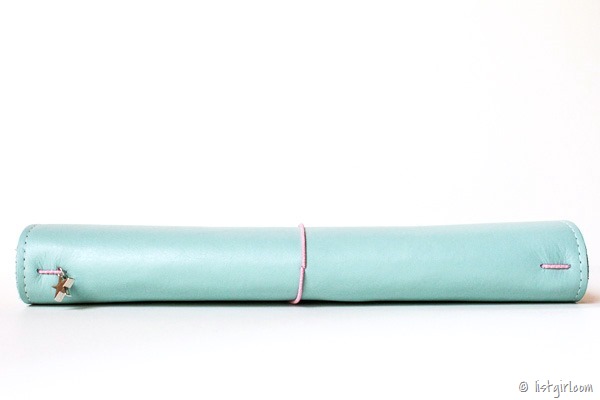
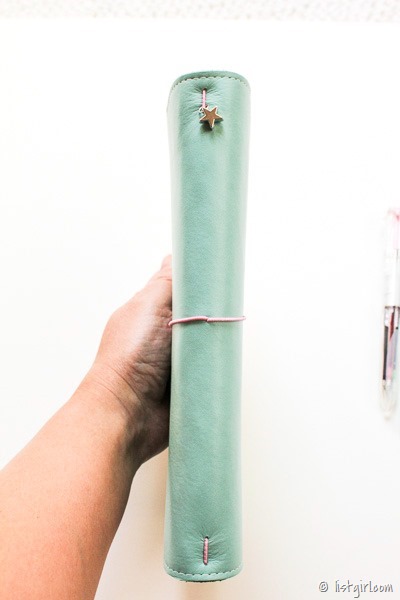
The star charm in the top loop.

20150613-IMG_5652_blog

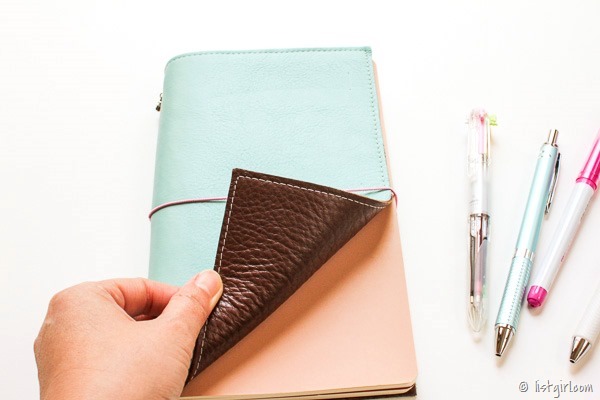
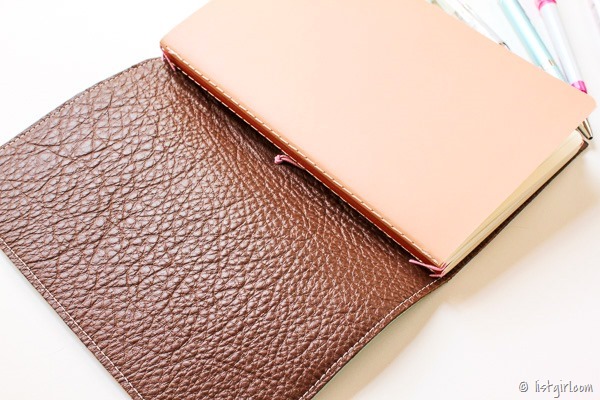
Since the chocolate brown leather is just as good quality and the light blue one, I can use that side as the outside when I feel like it.  I would just need to re-string the elastics.


20150613-IMG_5657_blog

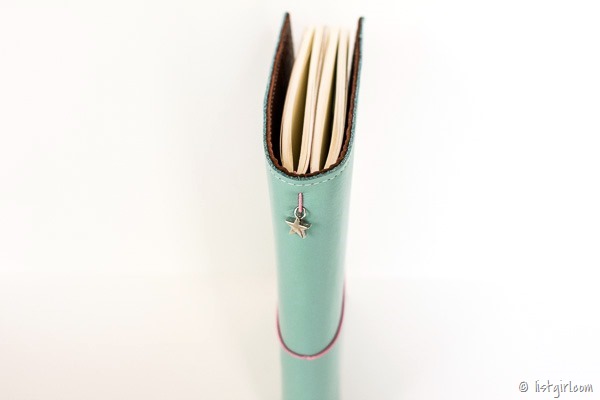
Sideways view.

20150613-IMG_5658_blog

20150613-IMG_5661_blog


20150613-IMG_5663_blog

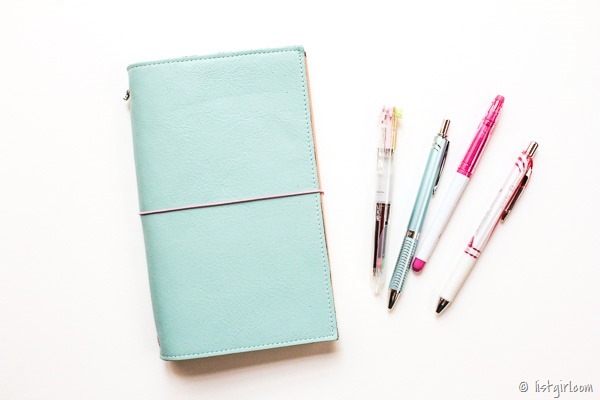
The finished notebook cover is 8.5x11 (I didn’t cut the leather, except to trim the edges so that both pieces are straight). 

20150613-IMG_5664_blog

I strung the elastics so that there are two vertical ones.  It holds two or more notebooks.  You can add elastic bands (or long rubber bands) to hold even more notebooks together. 

20150613-IMG_5672_blog

The width of the cover is exactly perfect to hold two 5x8.25 large Moleskine Cahier notebooks.  I happened to have the same sized Piccadilly Memo Medium notebooks, so I used those. 

20150613-IMG_5666_blog

The 5x8 May Books would fit in here too. 

20150613-IMG_5665_blog

I really love how my DIY reversible leather traveler’s notebook turned out!  The leather is soft and I love that it’s reversible.  I also love how economical it was to make something like this, with coupons for Michaels & Joann.  I just wish that the leather came in more colors, because I would make many more, ha ha!  This is my biggest sized traveler’s notebook.  It will most likely stay home.  I will use it for crafty planning & ideas.

Hope you enjoyed this tutorial on how I made my DIY traveler’s notebook, and are inspired to make one of your own!  ♥

Read More »

Sunday, June 14, 2015

Design A Softie | Pen Pouch Birthday Gift

20150529-2015-05-29 15.54.14_blog

After making that first softie for a baby shower, I decided to make a pencil pouch birthday gift for Peppermint.  I followed the same basic design, except that instead of a stuffed animal I turned it into a pen pouch.  And since it’s a pen pouch, I thought I would make him a nerdy cat! :-)

And I included two Uni-ball Signo DX Hello Kitty Limited Edition pens.

20150529-2015-05-29 15.55.38_blog

I used two pieces of felt for each side, front and back.  The outside is cream felt and the inside lining is gray felt.

20150529-2015-05-29 15.55.59_blog

20150529-2015-05-29 15.56.02_blog

I sent him off with a handmade card.

20150530-2015-05-30 08.42.20_blog

20150530-2015-05-30 08.43.29_blog

He got to Peppermint safely!

20150603-IMG_7867_blog

Read More »
[feedly mini]