
This week I mostly used digital journal cards. I print them out 6up onto a 8.5x11 matte photo paper. Then I use my Fiskars paper trimmer to cut them to size.

Two page spread of the week. If you remember from Week 4, on the right side I had used a Design F page protector. Which means this week’s 4x6 week title page is on the right side of the left-hand page, instead of the usual left side.

Left side. I really like having a bunch of 3x4 slots in this Design F page protector.

Once again I designed the “5” in my Silhouette software and cut it out with kraft paper. Then drew the white dotted stitching around the “5” to make it stand out more. The alpha stickers are American Crafts Amy Tangerine Hello Truffle Fabric Thickers.
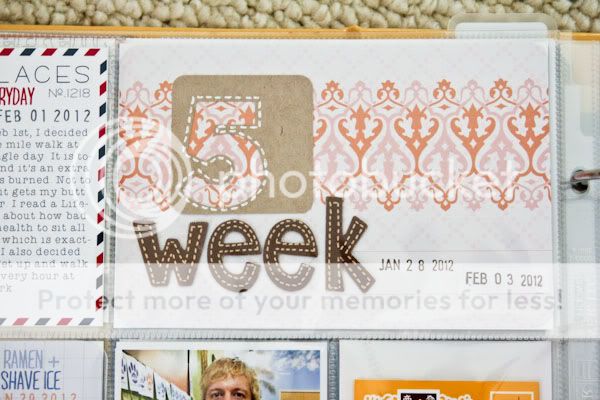
On February 1st I started walking one mile at lunch at work every day. I took two Instagram photos. One of the trail I walk on at work, and another of my leg while walking. The chevron background is a cutout with my Silhouette SD digital cutter, using some new 3x4 shapes by Lori Whitlock, created especially for Project Life. The right side is a digital journal card from the “Live Free: Love Life” set by Miss Tiina. (Free!)

The left side is a kraft paper cutout I designed and cut out with my Silhouette. The right is a screenshot of the last leg of Todd’s 60 mile bike ride.

I’ve been doing a Week-In-Review 3x4 card every week now for a while. This journal card is from “Press Cards No. 1” by Paislee Press. The right side is a background cut out with my Silhouette using yellow cardstock. (From the same set of 3x4 shapes by Lori Whitlock.) The tab is “Everyday Striped Journaling Tabs” (digital) from Elle’s Studio.

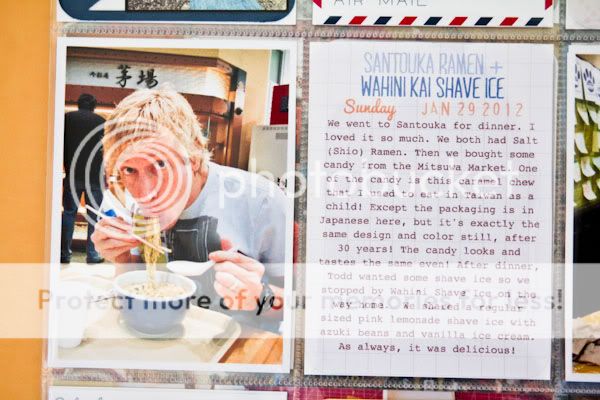
The right side is journaling I typed up in Photoshop and printed out onto a Project Life 3x4 Grid Journal Card. I did a video tutorial on how to print onto 3x4 journal cards.
Right-hand page. I talked about running 5 miles for the first time since August 2010. I took Todd out to dinner to celebrate his birthday.
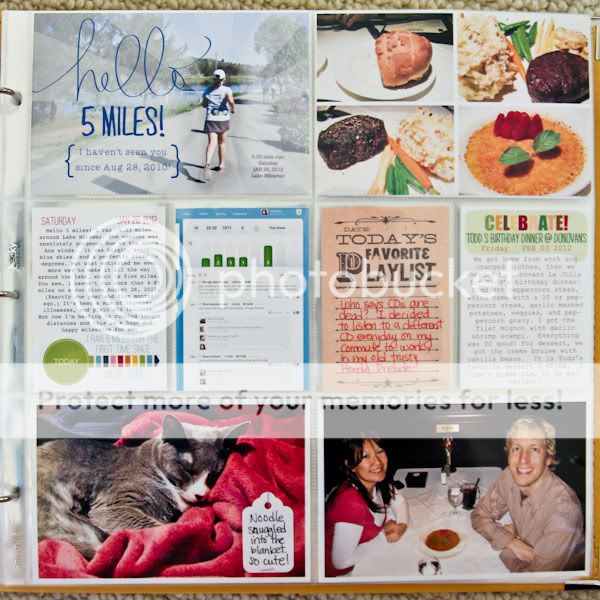
The journal card on the left is from the Entertainment SMASH Pad. On the right side is a journal card I created myself about Todd’s birthday dinner.

My running photo, journaling, and a screenprint of my Daily Mile training for the week.

Super-cute photo of Noodle. I used a little white tag I got on Amazon to write the caption and stapled it onto the photo.

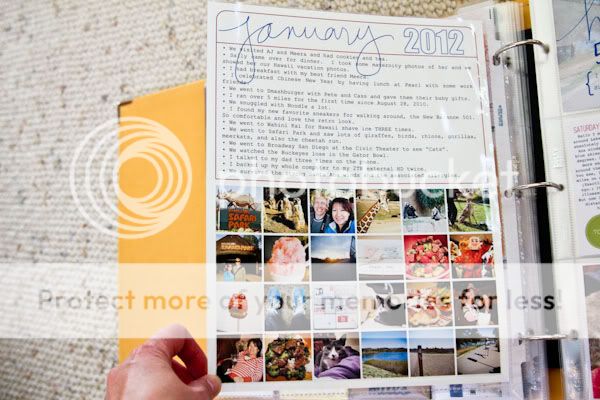
Since this week was the end of January, I did a double-sided 8.5x11 page to summarize the month. I basically took my January month-in-review blog post and turned it into a page in my Project Life album. I created the 8.5x11 photo collage in Adobe Lightroom, then I printed it out onto Red River 66 lb Polar Pearl Metallic photo paper. I love how it turned out! Then I cut the collage into two pieces for the front and the back of my 8.5x11 insert. I used “Days + Months Hand Drawn Brushes” by Ali Edwards for the “January” script.

The backside of my January Month-In-Review insert.
Pretty happy to be still keeping up with Project Life!
I’ve decided it takes too much time to find all the images and links to products that I’ve used, like I’ve done in the past few weeks. If you have questions please leave me a comment. :)
My favorite is your hello 5miles with that gradient mask and how you made your Jan in review.
ReplyDeletelove everything about this!
ReplyDeleteChristine, it's nice to see my diecut cards in action! Thanks for sharing!!
ReplyDeleteI love your month in review insert, Christine!!
ReplyDeletei am loving your project life!!!
ReplyDeleteDo you have any tips for printing out six cards on one page? No matter what I do, my computer always seems to clip off the ends of mine making them not quite 3X4.
ReplyDeleteKatie - there are a couple of things you can try. First, did you click on the "borderless" printing option? Printers tend to leave a border all the way around, even if you have things lined up there, unless you select to print it borderless. Secondly, make sure you minimize the extension after selecting to print borderless. Some printers automatically maximize the extension and make the graphic too big to fit onto the paper and thus cutting it off. The extension is usually a slider in print options.
Delete